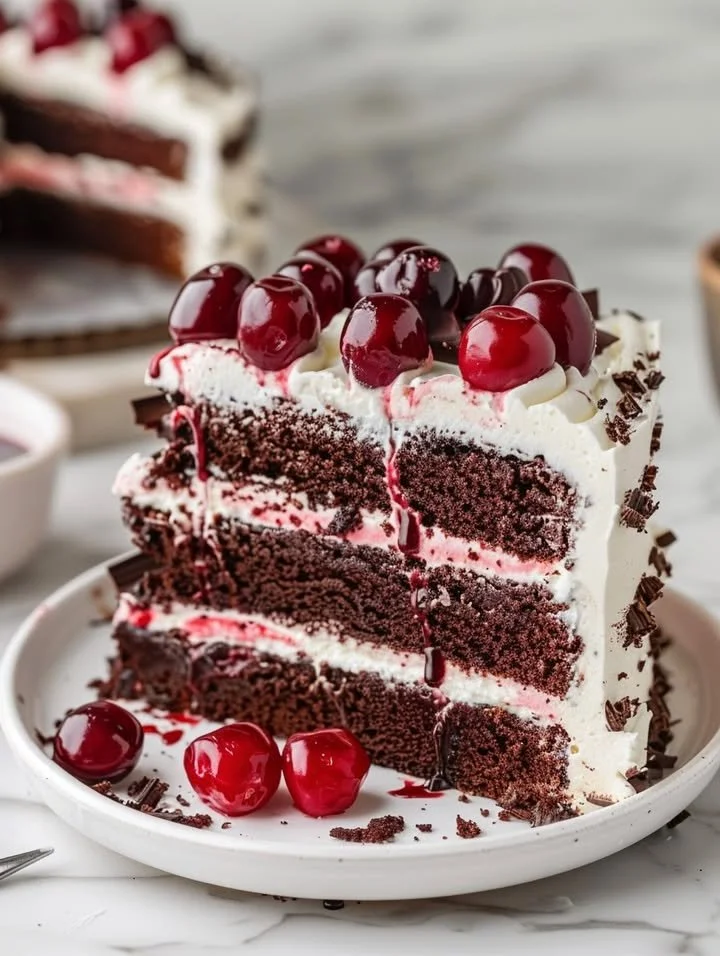
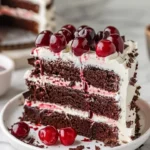
Black Forest Cake
Black Forest Cake is a luscious, decadent dessert that embodies the bliss of chocolate and cherries in every mouthful. This delightful cake is a show-stopper, perfect for special occasions or simply to indulge in something extraordinary. The rich layers of moist chocolate cake, whipped cream, and juicy cherries create a symphony of flavors and textures that will transport you to dessert heaven. In this recipe, we’ll cover all you need to know in step-by-step detail, ensuring you can create a masterpiece in your own kitchen.
The Black Forest Cake’s allure goes beyond its taste; it’s a celebration in itself. With its stunning presentation, it captivates attention and sparks joy at any gathering. The combination of chocolate and cherries not only pleases the palate but also evokes wonderful memories and emotions. It’s worth making not just for the taste, but for the smiles it brings.
Why You’ll Love This Recipe
You’ll fall in love with this Black Forest Cake recipe for several reasons. First, it’s incredibly easy to prepare, making it perfect for bakers of all levels. With straightforward steps, you can whip up this gourmet treat without feeling overwhelmed. Additionally, it’s family-friendly, appealing to both children and adults who adore the balance between chocolate richness and fruity brightness.
This cake is also wonderfully versatile; you can opt for a traditional recipe with classic ingredients or modify it with healthier swaps to suit dietary preferences. With minimal yet impactful ingredients, it invites creativity while keeping the process uncomplicated.
Ingredients for Black Forest Cake
- 1 3/4 cups all-purpose flour: This will give your cake a fluffy yet sturdy base.
- 2 cups granulated sugar: Sweetens the cake perfectly, balancing the rich cocoa.
- 3/4 cup unsweetened cocoa powder: Adds deep chocolate flavor, essential for a true Black Forest Cake.
- 1 1/2 teaspoons baking powder: Creates that ideal rise for the cake.
- 1 1/2 teaspoons baking soda: Works alongside the baking powder for perfect texture.
- 1 teaspoon salt: Enhances the flavors within the cake.
- 2 eggs: Bind the ingredients together, adding moisture and richness.
- 1 cup whole milk: Infuses the cake with creaminess.
- 1/2 cup vegetable oil: Ensures the cake stays moist and delicious.
- 2 teaspoons vanilla extract: Adds a lovely aromatic note.
- 1 cup boiling water: Helps to create a thin batter for a super moist cake.
- 2 cups heavy cream: For the luscious whipped topping.
- 1/2 cup powdered sugar: Sweetens the whipped cream to perfection.
- 1 teaspoon vanilla extract (for the cream): Enhances the flavor of the topping.
- 2 cups pitted and chopped cherries: The star ingredient that brings freshness and tang.
- 1/4 cup cherry brandy (optional): Adds a traditional touch for those who enjoy it.
- Chocolate shavings: For decorating your cake and adding texture.
- Maraschino cherries: A delightful garnish that adds a pop of color.
Step-by-Step Directions
Preheat your oven to 350°F (175°C) and prepare your two 9-inch round cake pans by greasing and flouring them.
In a large bowl, combine the dry ingredients: flour, granulated sugar, cocoa powder, baking powder, baking soda, and salt.
Add the eggs, milk, oil, and vanilla to the bowl and beat the mixture on medium speed for 2 minutes. Then, stir in the boiling water carefully—the batter will be quite thin, but that’s normal.
Pour the batter evenly into the prepared pans and bake for 30-35 minutes. To check if they’re done, insert a toothpick into the center; it should come out clean. Once baked, cool in the pans for about 10 minutes before transferring them to wire racks to cool completely.
For the whipped cream filling, whip the heavy cream in a chilled bowl until it begins to thicken. Gradually add the powdered sugar and vanilla, continuing to whip until stiff peaks form. Gently fold in chopped cherries and cherry brandy if using.
Once the cakes are cool, assemble them: place one layer on a serving plate and spread half of the cherry cream filling on top. Add the second layer and then spread the remaining cherry cream on top, creating a lovely height.
Decorate your cake with chocolate shavings sprinkled over the cream and place maraschino cherries on top for that classic touch.
It’s best to refrigerate the cake for at least an hour before serving, allowing the flavors to meld together beautifully.
Tips & Tricks
To enhance your Black Forest Cake, consider these secrets from the kitchen:
- For a richer chocolate flavor, use high-quality cocoa powder.
- Make sure to chill your bowl and beaters before whipping the cream for a fluffier texture.
- If you want a deeper cherry flavor, try reducing the cherries on the stove with a bit of sugar beforehand to create a syrup.
- If you’re seeking a healthier twist, substitute whole milk with almond milk and use a sugar alternative.
Serving Suggestions & Pairings
Black Forest Cake is a stunning centerpiece, but you can elevate the presentation by serving it with fresh cherry compote on the side. Pair it with a scoop of vanilla ice cream or some berry medley to lift the dessert experience. A side of steaming hot coffee or a cappuccino complements the chocolate beautifully, making it a perfect end to any meal.
Nutritional Information
While enjoying a slice of Black Forest Cake, it’s important to consider the indulgence of dessert. Each slice (estimated 1/12 of the cake) generally contains around 400-500 calories. The richness comes from the cake itself and the whipped cream. However, for a special treat, it’s worth every bite!
Storing Tips & Variations for Black Forest Cake
You can store any leftovers in the fridge for up to 3-4 days, covered to maintain freshness. If you want to prepare it in advance, you can freeze the cake layers before decorating—just wrap them well in plastic wrap and foil. For variations, you can use different fruits, such as strawberries or raspberries, to create a fruity twist. A gluten-free flour blend can also replace all-purpose flour for a gluten-free version without sacrificing taste.
Conclusion for Black Forest Cake
Now that you’ve learned how to create this incredible Black Forest Cake, it’s time to get baking! The combination of delicious chocolate, cherry goodness, and fluffy cream will not only satisfy your sweet cravings but will also be a hit among your family and friends. Don’t wait; gather your ingredients, follow our step-by-step guide, and indulge in the joy of crafting this iconic dessert!
FAQs
1. Can I make Black Forest Cake a day in advance?
Yes! You can prepare the cake layers beforehand and assemble them just before serving for the freshest taste.
2. Is it possible to make this cake gluten-free?
Absolutely! Simply substitute the all-purpose flour with a high-quality gluten-free flour blend.
3. How can I make the cake more chocolatey?
Consider adding chocolate chips to the batter or using dark chocolate cocoa powder instead of regular.
4. Can I skip the cherry brandy?
Yes, the cherry brandy is optional. You can replace it with cherry juice for a non-alcoholic version.
5. How can I prevent the cake from drying out?
Make sure not to overbake the cake and cover it well with whipped cream and cherries to keep it moist once served.
Black Forest Cake
Ingredients
For the Cake
- 1 3/4 cups all-purpose flour Provides a fluffy base.
- 2 cups granulated sugar Balances the rich cocoa.
- 3/4 cup unsweetened cocoa powder Essential for deep chocolate flavor.
- 1 1/2 teaspoons baking powder Creates ideal rise.
- 1 1/2 teaspoons baking soda Works alongside baking powder.
- 1 teaspoon salt Enhances overall flavor.
- 1 cup whole milk Infuses creaminess.
- 1/2 cup vegetable oil Keeps cake moist.
- 2 teaspoons vanilla extract Adds aromatic flavor.
- 1 cup boiling water Creates a thin batter.
For the Whipped Cream and Filling
- 2 cups heavy cream For a rich topping.
- 1/2 cup powdered sugar Sweetens the whipped cream.
- 1 teaspoon vanilla extract Enhances flavor of topping.
- 2 cups pitted and chopped cherries Star ingredient providing tang.
- 1/4 cup cherry brandy (optional) Traditional touch.
For Decoration
- Chocolate shavings For decorating the cake.
- Maraschino cherries For garnish.
Instructions
Preparation
- Preheat your oven to 350°F (175°C) and prepare your two 9-inch round cake pans by greasing and flouring them.
- In a large bowl, combine the dry ingredients: flour, granulated sugar, cocoa powder, baking powder, baking soda, and salt.
- Add the eggs, milk, oil, and vanilla to the bowl and beat the mixture on medium speed for 2 minutes. Stir in the boiling water carefully; the batter will be quite thin.
Baking
- Pour the batter evenly into the prepared pans and bake for 30-35 minutes. Check with a toothpick; it should come out clean. Cool in the pans for about 10 minutes before transferring to wire racks to cool completely.
Whipping Cream
- In a chilled bowl, whip the heavy cream until it begins to thicken. Gradually add the powdered sugar and vanilla, continuing to whip until stiff peaks form. Gently fold in chopped cherries and cherry brandy if using.
Assembling the Cake
- Once the cakes are cool, place one layer on a serving plate and spread half of the cherry cream filling on top.
- Add the second layer and spread the remaining cherry cream on top.
- Decorate with chocolate shavings and maraschino cherries.
Chilling
- Refrigerate the cake for at least an hour before serving.