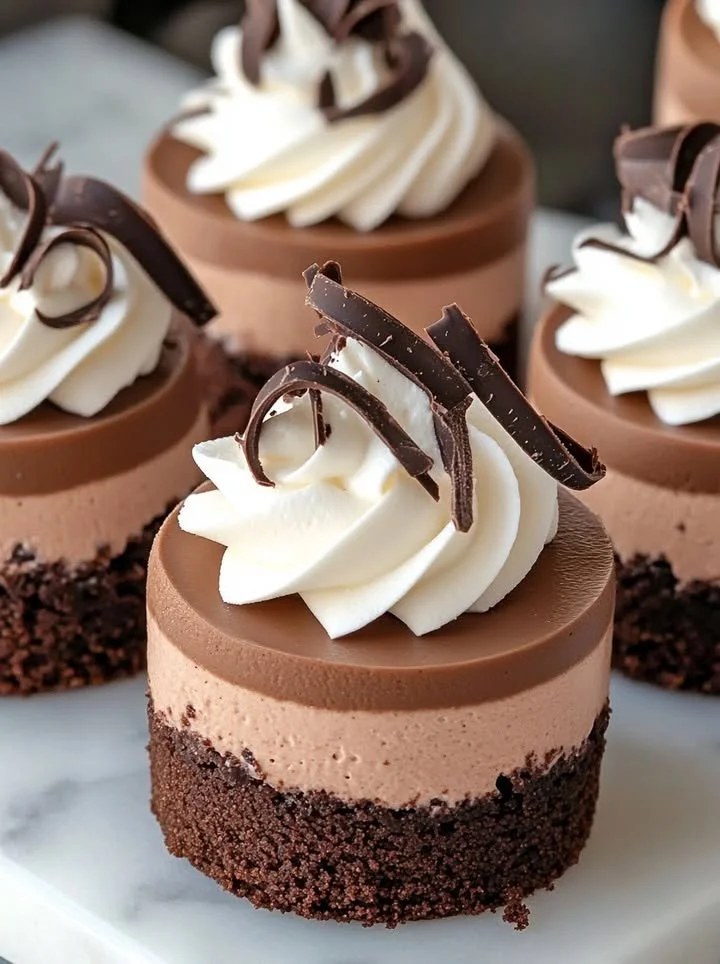
No Bake Mini Chocolate Cheesecakes
No Bake Mini Chocolate Cheesecakes are the perfect treat to satisfy your sweet tooth without the hassle of baking. Imagine small, luscious chocolate cheesecakes, each rich and creamy, with a satisfying crunch from the crust. These mini desserts are everything you dream of when craving chocolate: deliciously decadent yet incredibly simple to prepare. Whether it’s for a special occasion or just a mid-week treat, this recipe is a must-try! With its step-by-step instructions, you’ll be whipping up these little delights in no time.
Why You’ll Love This Recipe
This No Bake Mini Chocolate Cheesecake recipe is everything you want in a dessert—easy to prepare, family-friendly, and quick enough to make on a whim. With minimal ingredients, it allows even novice cooks to create a stunning dessert that will impress friends and family alike. The combination of whipped cream and rich semisweet chocolate in these cheesecakes makes each bite an indulgence. Enjoy them as is or add your favorite toppings for an even more personalized touch!
Ingredients for No Bake Mini Chocolate Cheesecakes
- 5 tbsp unsalted butter, melted – Adds richness and helps the crust hold together.
- 1 1/2 cups crushed chocolate cookies – Provides a chocolatey base with a satisfying crunch.
- 1/4 cup heavy cream – Enhances the creaminess of the filling.
- 1 tsp vanilla extract – Infuses a sweet aroma and flavor.
- 8 oz cream cheese, softened – Serves as the base for the creamy filling.
- 1 cup semisweet chocolate chips, melted and cooled – Intensifies the chocolate flavor.
- 1/2 cup white sugar – Sweetens the cheesecake to perfection.
- Whipped cream (as needed) – A fluffy topping that contrasts beautifully with the cheesecake.
- Chocolate curls or shavings (for garnish) – Adds an elegant finish.
Step-by-Step Directions for No Bake Mini Chocolate Cheesecakes
Make the Crust: Begin by mixing the melted butter with the crushed chocolate cookies in a bowl until well combined. The mixture should resemble wet sand. Next, press this mixture firmly into the bottom of a lined muffin tin or mini cheesecake pan, making sure to create a uniform layer. Once done, place it in the refrigerator for about 30 minutes to chill, allowing the crust to set.
Mix the Filling: In another mixing bowl, beat the softened cream cheese and white sugar together until the mixture is smooth and creamy. Then, add the vanilla extract and heavy cream, continuing to mix until fully incorporated. Finally, gently fold in the cooled melted chocolate until the filling is rich and decadent.
Fill the Cups: Take the chilled crusts out of the refrigerator and spoon the luscious filling over each one, smoothing the tops with a spatula for a clean finish. You want to fill them just to the top without overflowing.
Chill: Return the filled mini cheesecakes to the refrigerator and let them chill for at least 4 hours, or until firm enough to hold their shape when removed from the tin.
Finish & Serve: When you’re ready to serve, carefully remove the mini cheesecakes from the muffin tin. Top each one with a generous dollop of whipped cream and garnish with chocolate curls or shavings for that picture-perfect finish. Keep them chilled until serving time!
Tips & Tricks
To elevate your No Bake Mini Chocolate Cheesecakes, consider adding a hint of espresso powder to the chocolate filling for an enhanced flavor depth. Alternatively, experiment by using flavored whipped cream or toppings like crushed nuts or fresh berries to make each serving unique. For those who prefer a more chocolatey experience, use double the amount of chocolate chips in the filling. Remember, allowing the cheesecakes ample time to chill is key for achieving the firmness you’ll enjoy.
Serving Suggestions & Pairings
These mini cheesecakes are versatile and can be served at various gatherings. Pair them with a rich, dark coffee or a sweet dessert wine for an adult gathering. You could also serve them with fresh fruit, like strawberries or raspberries, which balances the richness with a touch of acidity. For an extra layer of flavor, consider drizzling some caramel or chocolate sauce over the top just before serving.
Nutritional Information
Each mini chocolate cheesecake, when portioned correctly, delivers a delightful indulgence without being overly indulgent. While exact nutritional values depend on the specific brands and quantities used, you can generally expect each cheesecake to contain around 250-300 calories. With its creamy filling and chocolate base, it’s a treat best enjoyed in moderation.
Storing Tips & Variations for No Bake Mini Chocolate Cheesecakes
To store your No Bake Mini Chocolate Cheesecakes, simply keep them in an airtight container in the refrigerator for up to a week. If you want to prepare these treats in advance, they also freeze well. Just ensure they are tightly wrapped and labeled, and they can last up to 3 months in the freezer. Looking for healthier options? Swap out the cream cheese for Greek yogurt for a lighter twist or use sugar alternatives if you’re watching your intake.
Conclusion for No Bake Mini Chocolate Cheesecakes
Ready to treat yourself to an irresistible dessert? These No Bake Mini Chocolate Cheesecakes are perfect for any occasion, from casual family dinners to formal gatherings. The delightful flavors and textures will impress everyone, and the ease of preparation makes them a go-to recipe for any home chef. So, gather your ingredients and get started on creating these chocolatey delights!
FAQs
1. Can I make these No Bake Mini Chocolate Cheesecakes gluten-free?
Yes! Simply use gluten-free chocolate cookies for the crust.
2. How do I prevent the filling from cracking?
Make sure to let the chocolate cool slightly before incorporating it into the cream cheese mixture. Also, avoid overmixing once you add the chocolate.
3. Can I use milk chocolate instead of semisweet chocolate?
Absolutely! Milk chocolate will provide a sweeter flavor, which some may prefer.
4. How do I know when the cheesecakes are firm enough?
They should feel set to the touch and should hold their shape when you remove them from the pan.
5. Can I add other flavors to the filling?
Yes! You can experiment with flavors like peppermint extract, fruit purees, or even spices like cinnamon to create unique variations.
No Bake Mini Chocolate Cheesecakes
Ingredients
For the Crust
- 5 tbsp unsalted butter, melted Adds richness and helps the crust hold together.
- 1.5 cups crushed chocolate cookies Provides a chocolatey base with a satisfying crunch.
For the Filling
- 1/4 cup heavy cream Enhances the creaminess of the filling.
- 1 tsp vanilla extract Infuses a sweet aroma and flavor.
- 8 oz cream cheese, softened Serves as the base for the creamy filling.
- 1 cup semisweet chocolate chips, melted and cooled Intensifies the chocolate flavor.
- 1/2 cup white sugar Sweetens the cheesecake to perfection.
- Whipped cream as needed Whipped cream A fluffy topping that contrasts beautifully with the cheesecake.
- Chocolate curls or shavings for garnish Chocolate curls or shavings Adds an elegant finish.
Instructions
Make the Crust
- Mix the melted butter with the crushed chocolate cookies in a bowl until well combined. It should resemble wet sand.
- Press this mixture firmly into the bottom of a lined muffin tin or mini cheesecake pan to create a uniform layer.
- Refrigerate for about 30 minutes to allow the crust to set.
Mix the Filling
- In another mixing bowl, beat the softened cream cheese and white sugar together until the mixture is smooth and creamy.
- Add the vanilla extract and heavy cream, continuing to mix until fully incorporated.
- Gently fold in the cooled melted chocolate until the filling is rich and decadent.
Fill the Cups
- Remove the chilled crusts from the refrigerator and spoon the filling over each one.
- Smooth the tops with a spatula for a clean finish without overflowing.
Chill
- Return the filled mini cheesecakes to the refrigerator and let them chill for at least 4 hours.
Finish & Serve
- Carefully remove the mini cheesecakes from the muffin tin.
- Top each one with whipped cream and garnish with chocolate curls or shavings.
- Keep them chilled until serving time.